
Did you know that there are hidden hacks in Google Chrome that can take your browsing experience to the next level? These hacks allow you to customize Chrome, increase productivity, and enhance security. Who doesn’t want that?
One of the best hacks is customizing Chrome to fit your personal preferences. This means changing things like the background image, font size, and even the color scheme. By doing this, you’ll be able to make Chrome feel like your own, and it’ll make browsing more enjoyable.
Overall, customizing Chrome, using multiple profiles, mastering keyboard shortcuts, and enhancing security are just a few of the many hacks that can improve your browsing experience. Give them a try and see how they can improve your time spent online.
Table of Contents
My Favorite Google Chrome Hacks
Aside from basic search functions, there are several hacks and features that can help you navigate through Chrome more efficiently, keep your browsing secure, and customize your user experience to your liking. In this article, we’ll explore some of the best Google Chrome hacks to help improve your browsing experience. Let’s dive in!
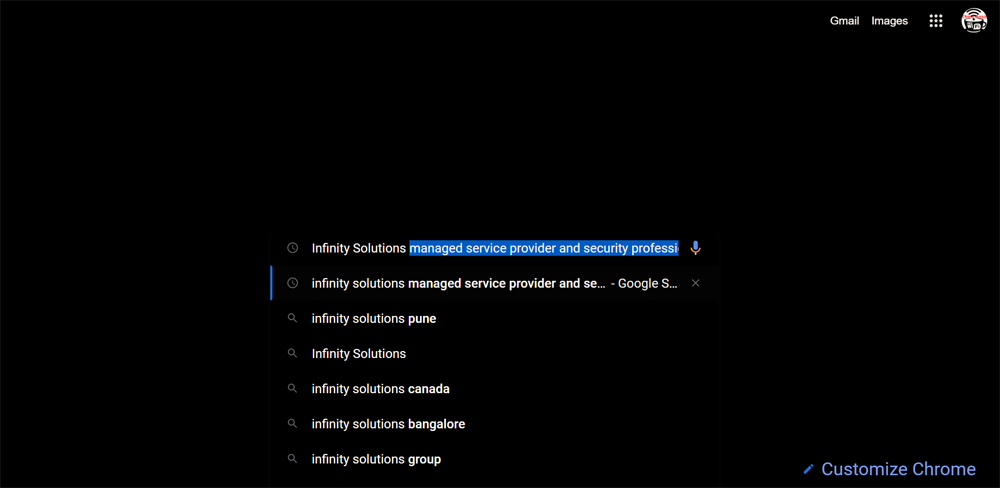
Customize Your Homepage and New Tab Page
Did you know you can customize your Google Chrome homepage and New Tab page? Here’s how you can do it!
First off, let’s tackle the homepage. Your homepage is the webpage that automatically opens when you launch Chrome or click on the “Home” button. To change this page, click the three-dot icon on the top right of your browser window. From the dropdown menu, select “Settings.”
Ready to make your browsing experience even better? Follow these simple steps:
- Head to the “On startup” section.
- Choose “Open a specific page or set of pages.”
- Add your favorite website.
Voila, instant homepage happiness! This way, Chrome will always open up that page when you launch or click the “Home” button.
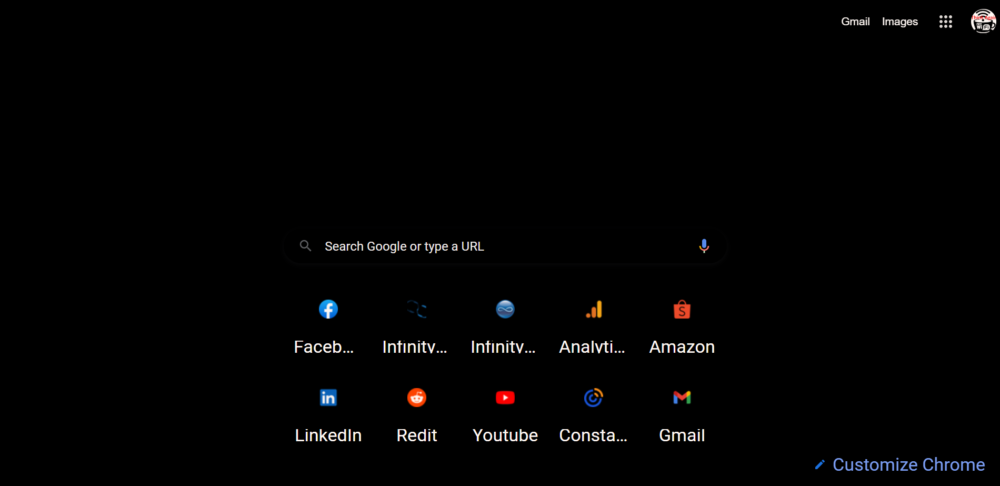
Now, let’s discuss the New Tab page. This is the page that appears when you click on the plus sign icon at the top or when you open a new tab. To customize this page, click on the “+” icon at the top of the page and select “Customize this page.”
Here, you can choose the layout and theme of your New Tab page and the content you want to display. You can add shortcuts to your favorite websites, display the weather, and even add a to-do list. This way, you can quickly access your most visited sites and see important information at a glance.

Quickly Access Important Websites with Bookmarks Bar
The Bookmarks Bar is a simple yet powerful feature in Google Chrome that can make your life much easier. It allows you to save and access your favorite websites quickly with just a click of a button. Here’s how you can use the Bookmarks Bar to access important websites quickly:
First, you need to bookmark a website. You can do this by either using the keyboard shortcut “Ctrl+D” (Windows) or “Cmd+D” (Mac) or by clicking the star icon on the right side of the Omnibox. Once you’ve bookmarked a website, it will appear in the Bookmarks Bar.
Now, it’s time to organize your bookmarks. You can do this by dragging and dropping bookmarks to the desired location on the Bookmarks Bar. You can also remove any unnecessary text to make the bookmarks more concise. This will help you quickly locate the website you need.
Here are the top 5 most frequently visited or important websites that you should add to your Bookmarks Bar for easy access:
1. Your email account
2. Your favorite news website
3. Your social media account
4. Your project management tool
5. Your online banking website
It’s important to keep your Bookmarks Bar well-organized for maximum productivity. This will help you quickly find the websites you need without wasting time searching. Remember to regularly check and update your Bookmarks Bar to ensure that it remains up to date. Utilizing the Bookmarks Bar lets you quickly access important websites without having to search for them every time.

Use the Omnibox for Easy Navigation
Google Chrome’s Omnibox is more than just an address bar or search box; it’s a powerful tool that can help you navigate the web seamlessly. Here are some ways to take advantage of this feature:
1. Google Search: The Omnibox integrates Google’s search engine right into your browser! Instead of going to Google’s homepage, type in your search term and hit enter. You’ll get results without ever leaving your current page.
2. Quick Conversions: Need to convert miles to kilometers or ounces to grams? The Omnibox can handle quick conversions like these. Simply type in the units you want to convert, and the conversion will appear on the results page.
3. Searching Within a Website: Instead of navigating through a website’s menu to find the page you need, use Omnibox to search the site. Type in the site’s name, followed by a keyword related to the page you want, and press the tab. You’ll see a list of pages related to your search term within that website.
4. Autocomplete: The Omnibox is designed to make searching easier, and it does that by offering autocomplete suggestions based on your search history and popular searches. It can also help you spell-check and correct your search terms as you type.
The Omnibox is an incredibly useful tool that saves you time and makes web browsing more efficient. Try it and see how it can change how you surf the web!
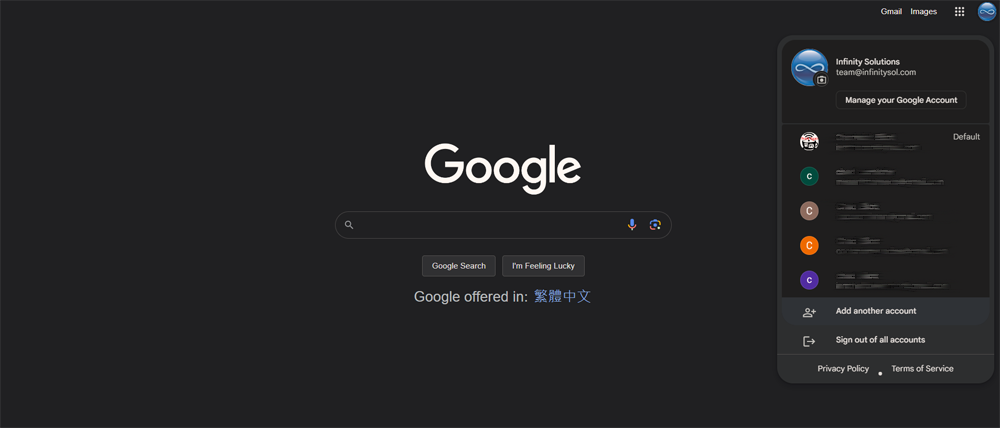
Create Multiple Browser Profiles
Have you ever used the same browser for personal and work purposes? Trying to keep everything organized when browsing the web can get confusing and messy. Thankfully, there is a solution: creating multiple Chrome profiles!
Setting up multiple profiles allows you to keep your bookmarks and settings separate and organized. This feature is especially useful when using the same device for personal and work purposes.
Creating a new profile in Chrome is super easy. Click on the profile icon in the browser window’s top right corner. Click the “Add” button from there and choose a name and photo for the new profile. That’s it!
Once you have multiple profiles set up, switching between them is a breeze. Just click on the profile icon and select the profile you want to use, and it’s that simple.
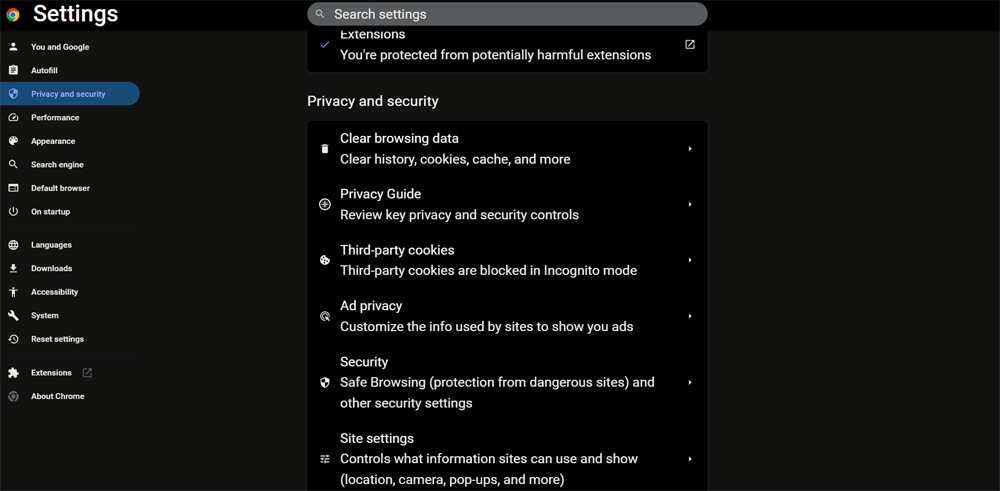
Adjust Your Security Settings
Do you use Google Chrome to surf the web? If so, you should know about adjusting your security settings to protect yourself while browsing. Here’s how you can do it:
First, go to the Settings menu by clicking on the three-dot icon on the top right corner of your browser. Then, scroll down and click ‘Settings’ to explore more options.
Next, find and select the ‘Privacy and Security’ menu. This is where you can adjust your security settings to ensure maximum protection.
To start, enable Phishing and Malware Protection. This feature can detect and prevent malicious websites from harming your computer or stealing your personal information.
You can also disable auto-fill to prevent websites from saving your personal information, such as your name, address, and payment details.
Another useful security feature is clearing browsing data. Doing this periodically removes cookies, cache, and browsing history that can reveal your online activities to others.
You can also protect your privacy and security by restricting cookies and JavaScript. These options can prevent websites from tracking your activity and accessing your device’s resources without your permission.

Personalize the Appearance of Browser Tabs
Personalizing the appearance of tabs in Google Chrome can greatly enhance your productivity and make tab management easier. Chrome allows users to change the color and name of tabs and even group tabs by color.
To start, right-click on the tab you want to personalize and select “Add To New Group” Here, you can choose a preset color from the list. This will help you easily recognize and differentiate between tabs when multiple tabs are open.
Next, give the tab a unique name that describes its purpose or content, making it easier to find and organize the tab when needed. For example, if you are researching a project for work, you might name the tab “Work Project Research.”
Finally, you can group related tabs by color to quickly differentiate between different types of tabs. This is particularly useful if multiple tabs are open for different projects or tasks. For example, you might group all work-related tabs in one color group and personal tabs in another.
By personalizing the appearance of tabs in Google Chrome, you can improve your productivity and streamline your workflow. Give it a try and see how it works for you!

Enable Experimental Features on Chrome
Do you want to try out some advanced features yet to be available to everyone on Google Chrome? Well, you can! Chrome has a page called “chrome://flags,” where you can find a list of experimental features you can enable or disable.
To access this page, all you need to do is type “chrome://flags” into the address bar. That’s it! You’ll be taken straight to a page listing all the experimental Chrome features.
But wait, before you go ahead and start enabling every feature you see, there’s one important thing you need to know. Some of these features are not stable, and they may cause bugs or crashes. If you don’t know what you’re doing, it’s best to avoid these features.
That being said, if you’re feeling adventurous and willing to take some risks, you can enable any feature you like. To enable a feature, search for it on the page, click the drop-down menu next to it, and select “Enabled.”
So, what are you waiting for? Go ahead and try out some of these experimental features and see what they can do. Just remember to proceed with caution!

Pin Tabs to Reduce Clutter and Increase Productivity
Are you someone who always has countless tabs open in their Google Chrome browser? Do you feel overwhelmed by the clutter and struggle to navigate through these tabs? If so, you need to learn about pinning tabs in Chrome!
Pinning a tab in Chrome is a simple yet effective way to reduce clutter and increase productivity. By pinning a tab, you can minimize it to display only its icon, giving you more space to multitask without losing track of your important websites.
To pin a tab in a web browser, right-click on the desired tab and choose the “Pin” option from the context menu. Once you’ve pinned a tab, it will appear on the left-hand side of the browser as a smaller, condensed version of the tab. This trick saves you time by ensuring that the most frequently accessed tabs are always available for quick navigation.
Utilize Search Engines to Find Answers Quickly
Do you ever find yourself spending way too much time sifting through search results when you’re trying to find answers online? Fear not, my friend! By mastering a few simple tricks, you can navigate the vast expanse of search engines and find what you’re looking for more efficiently.
One such trick is using targeted search terms or search syntax. This means using specific keywords and symbols to communicate exactly what you’re looking for to the search engine. For example, putting a phrase in quotation marks will give you exact match results for that phrase only. Want to exclude a word or phrase from your search results? Just use a minus sign before the word or phrase.
Another helpful tip is to use specific keywords related to your search to narrow down results. This could mean adding a location, time period, or other relevant details to your search.
Of course, remember to utilize Chrome’s built-in search option as well. This can be done by highlighting a word or phrase and right-clicking to select “Search Google for [highlighted text]” or dragging and dropping it directly into the Omnibox.

Use Keyboard Shortcuts to Speed Up Browsing
Keyboard shortcuts are the way to go if you want to save time while browsing the web on Google Chrome. These shortcuts are simple actions on your keyboard to quickly access different browser features without clicking around with your mouse. Here are some of the top keyboard shortcuts to speed up your browsing experience on Chrome:
1. Switch between tabs: Use Ctrl+Tab to move to the next tab and Ctrl+Shift+Tab to move to the previous tab.
2. Open new windows: Press Ctrl+N to open a new window or Ctrl+T to open a new tab.
3. Access the Omnibox: Use Ctrl+L or Alt+D to jump directly to the Omnibox, where you can type in your web address or search query.
4. Open the task manager: Use Shift+Esc to open Chrome’s task manager to see which sites or extensions use the most resources.
5. Reopen closed tabs: Use Ctrl+Shift+T to reopen the last closed tab. This can be a lifesaver if you accidentally close a tab you didn’t mean to.
6. Open an Incognito window: Use Ctrl+Shift+N to open a new Incognito window for private browsing.
Using these keyboard shortcuts, you can easily navigate through Chrome tabs and windows, jump directly to the Omnibox for quick searches, and even open an Incognito window for private browsing. It’s important to note that these keyboard shortcuts work on Windows and Linux systems, with slight variations on macOS.
Change File Types When Downloading Files
Have you ever downloaded a file on Google Chrome and realized it wasn’t the format you expected? Don’t worry; you can easily change the file type when downloading files using some simple steps.
First, you need to navigate to the settings menu. You can do this by clicking on the three-dot icon in the upper right-hand corner of your browser window. Select “Settings” from the dropdown menu that appears.
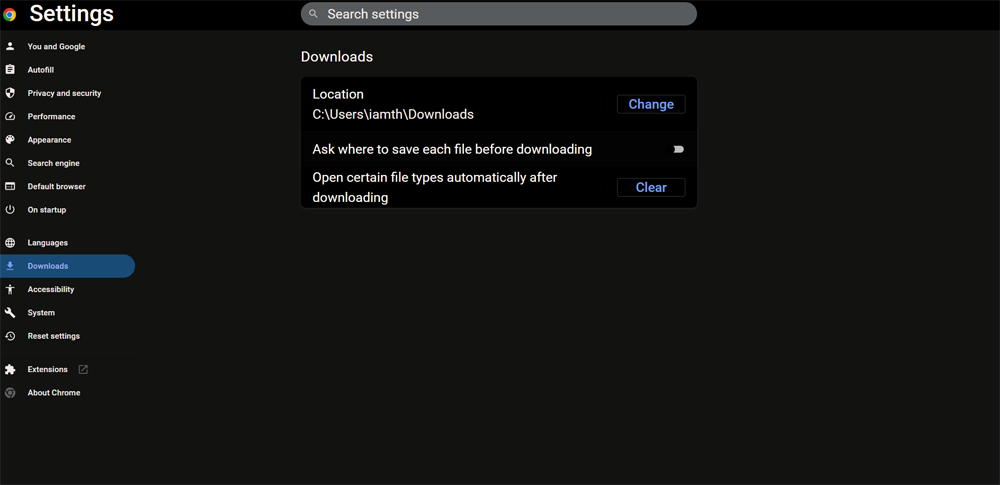
Once you’re in the settings menu, scroll down to the middle of the page and click on “Downloads.” Click on that to continue.
Here, you can change the download location or specify the download behavior, including asking where to save each file or automatically downloading files to a specific folder. However, if you want to change the file type of your downloads, select the “Ask where to save each file before downloading” option. By doing this, when you download a file, Chrome will ask you where to save it, allowing you to choose the type of file format you want.
Now you’re all set! By following these simple steps, you can change the file type of your downloads in no time. Don’t let the wrong file format get in the way of enjoying your downloads anymore. Give this a try today!
So, the next time you’re downloading files and want to ensure you get them in the format you want, remember these quick steps: settings menu, advanced, downloads, and select “Ask where to save each file before downloading.” Good luck!
Wrapping Up
Following the tips and browser tricks outlined above, you can quickly become a Google Chrome power user. From keyboard shortcuts to changing file types when downloading files, these simple hacks will help you easily navigate through Chrome. Now that you know all of the best Google Chrome hacks, it’s time to implement them and get the most out of your browser experience. Happy browsing, and if you need assistance, message us!